Completed N7 Rifle build
_______________________________________________________________________
The N7 Valkyrie Rifle got pretty beat up at comic con/in transit and we have begun stripping all the paint off and refinishing it. It is going to look even better, we have a cool paint technique in mind. Check back for official "finished" photos soon!
99% Complete: N7 Valkyrie Rifle build!
Just in time for Comiccon...scratch that. A few hours after we were supposed to leave for Comiccon...no thats not right either. Im in my hotel room now for comiccon putting finishing touches on the Valkyrie. It will still need a little work after the convention.
But in any case its basically done. It was a megaton of work/ lost sleep.
I built it in a garage in arizona in the summer. So no more days of 114 degree shop work will be appreciated.
-The gun weighs around 15 lbs which feels like a lot more when its a gun.By comparison, My Benelli M4 shotgun only weighs 11lbs and it feels like a lot of gun.
The Valkyrie is almost entirely aluminum, and it is solid everywhere except the barrels which are hollow tube. It has a working trigger with magnetic springs, real rubber grips (fore grip, end piece, and gripframe pieces), and a green laser in the upper barrel. The grip is a modified thumbhole stock.
Im not happy with the paint. I may redo it completely. If you look closely at the photos you will see some paint defects. I will be fixing them soon.
But all in all I am very happy with it. I have never done a piece like this and it is very satisfying to see it complete.
I welcome your comments and questions. Hope you enjoy the pictures. When I get it 100% I will provide better pics. -Zoot
 |
| Just a few paint touch ups to go! |
 |
| Grips carved & sanded out of a block or rubber |
 |
| Close up of rubber grips and barrels |
 |
| Taping for paint |
BUILDING THE STOCK/GRIP
 |
| Carved up rifle stock used as base for grip (hardly recognizable at this point) |
 |
| Trigger group made with magnets |
 |
| Internal structure of functioning trigger |
 |
| Filled it with epoxy and sanded it down by hand |
 |
| Added rubber around grip |
 |
| Filled the holes with red epoxy and sanded it smooth again |
 |
| Preparing to merge the grip to the gun |
 |
| Preparing to attach the grip to the gun |
 |
| Covered a certain portion of the grip with a metal plate on each side. |
MOUNTING THE BARRELS
MOVING FORWARD
 |
| We bought a real rifle stock and sized the gun to real life |
 |
| A lot of hand sanding involved to get the gun smooth |
EARLY STAGES
 |
| SOLID ALUMINUM SLABS! |
 |
| Stacked 2 slabs of aluminum and cut them at the same time in order to get the perfect curve for 2 different pieces. |
 |
| Cut very slowly, produced a lot of aluminum shavings, haha |
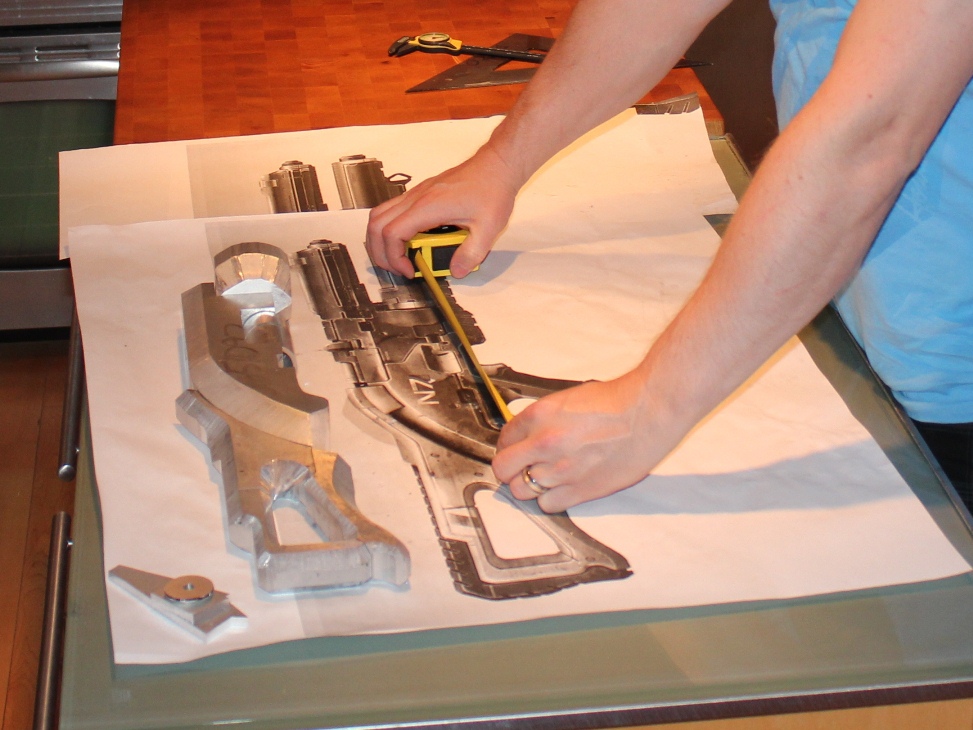
 |
| Matched pieces up with our source photo. |


Awesome Rifle and Armour. You still selling the rifle? in this Blog? or on eBay?
ReplyDeleteWhat you charge to build a rifle like this on commission?